USING SHOUTCAST OR ICECAST HOST SERVER
Overview
1. Set up Nicecast as in the Basic Setup tutorial of your user manual.
2. Open the Server window, click External in the drawer, and create a New server.
3. Highlight the server, and adjust the settings as indicated below. Finally, switch the radio button in the drawer.
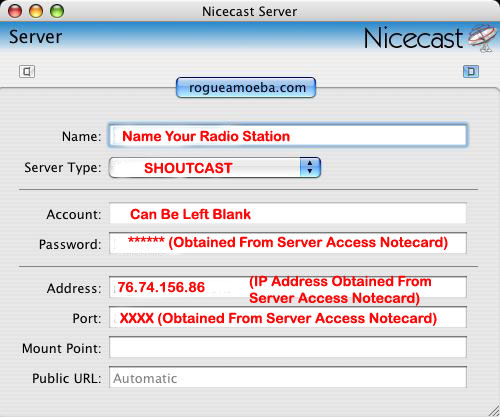
Setting up an external Shoutcast server running on a remote machine.
To do this, an External Server is created and used (by selecting it in the target column of the Servers drawer).
Adjust the settings as appropriate for your specific server (See below image).
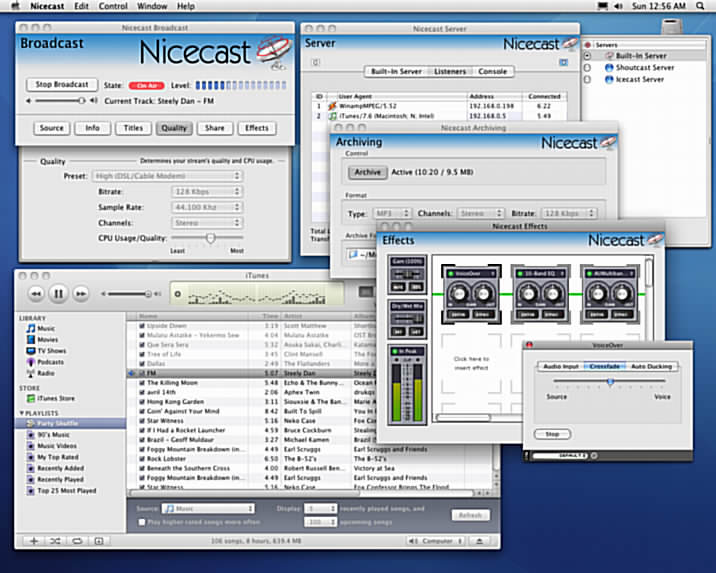
SETTING QUALITY TAB
The Quality Tab settings may very depending on your upload
and download speed. Refer to your user manual for your
proper settings. The settings below represent settings for
HIGH SPEED DSL OR CABLE MODEM.

If you encounter skipping with your stream, see Pages 16 & 17 in your user manual for adjustment instructions.
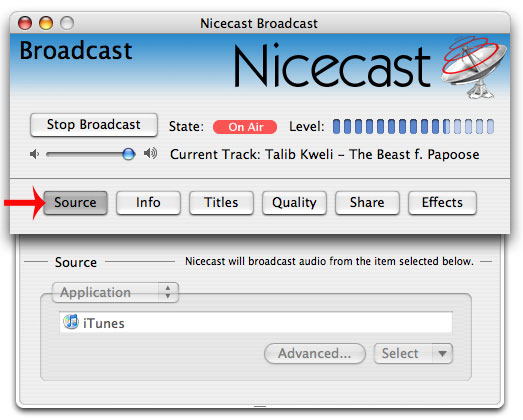
SOURCE TAB INFORMATION
Setting up a Nicecast broadcast is very simple - in its default settings, you can be broadcasting iTunes in just one click. But let's run over the steps needed to get going with Nicecast, with any source. First, it's good to know a little bit about Nicecast works, to increase understanding of the application overall. Essentially, Nicecast works in two portions, as follows:
Broadcast Portion
-Audio comes into Nicecast from a source application or device.
-Audio is routed through any optional audio effects you set (Effects window).
-Audio is encoded to MP3, as specified in the Quality Drawer.
Server Portion
-Audio is output to be tuned in to by listeners, using any MP3 client. An external server running SHOUTcast is preferable.
Overview
1. Open Nicecast and set a source application or input device.
2. Adjust the Info drawer, optionally turn on the Stream Tracker listing, and add optional audio Effects.
3. Set the proper Quality level, and click the Start Broadcast button. You're on the air!
Details
The first thing to do to get set up is to pick a Source. Open the Source drawer, and choose an application
(like iTunes or QuickTime) or device (such as a microphone or mixer).
Now comes the trickiest part - the Quality drawer. Nicecast automatically sets the value based on what your connection
to the world is. However, you're free to adjust it. For more information, see the Broadcast window below.
Before you click the Start Broadcast button, set everything as you desire in the Info drawer .
These settings will go out to listeners. Additionally, you can adjust the audio of the broadcast,
using the Effects window. Once this is complete, click Start Broadcast, and you should be streaming!
4. Click Start Broadcast in the Broadcast window. You're on the air, using your external server!